Quickstart Tutorial
In this page, you’ll find simple example programs for you to familiarized with Simplekivy’s api and the standard Codding Conventions. Make sure to first get started.
Codding Conventions
import SimpleKivy.SimpleKivy as sk- Name your app’s main layout
lyt. - Make sure the
kargument of your widgets (widget id) is of typestr. - Name your
event_managerfunctionevman. - … and name the first two positional arguments of your
event_managerfunctionappandev:1 2
def evman(app,ev): pass
- Name your
MyAppinstanceapp:1
app = sk.MyApp(...)
Why Do You Need Conventions?
- In this documentation you’ll find example programs and tutorials that follow the same naming conventions for simplicity.
- Following the same naming conventions in your code will let you copy and paste the example code into your programs with minimal or no modifications needed.
- If you wish to share your code or help others, your code will be understandable for anyone familiar with
SimpleKivy.
Your First App
As your first app, lets just show a simple “Hello world” message. 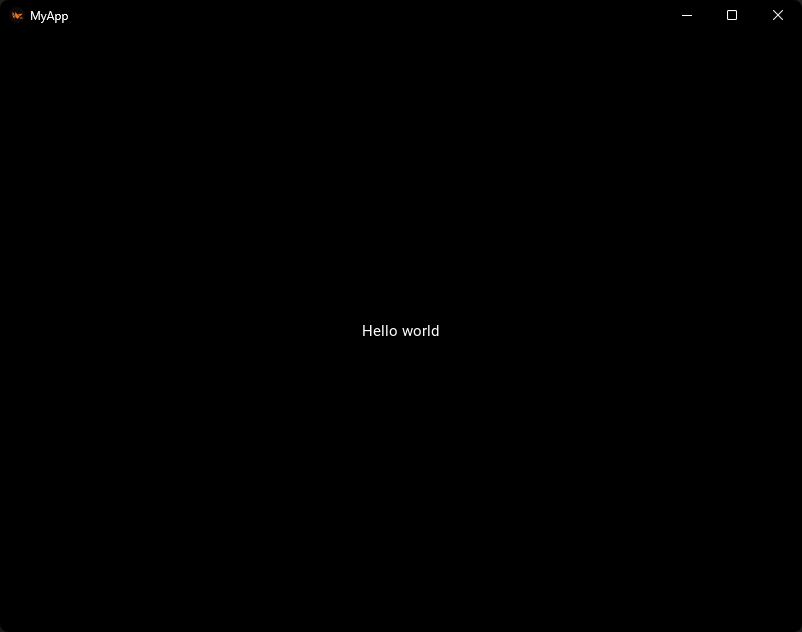
1
2
3
4
5
6
7
8
import SimpleKivy.SimpleKivy as sk

lyt=[
    [sk.T('Hello world')]
]

app = sk.MyApp(layout=lyt)
app.run()
“Say hi!” App
Let’s make something more complex to indroduce you to Widget Sizing and Event Handling. Let’s make an app that greets the user by the name they input in a text box when they press a button.

1
2
3
4
5
6
7
8
9
10
11
12
13
14
15
16
17
18
19
20
import SimpleKivy.SimpleKivy as sk

lyt=[
    [sk.BoxitH(
        sk.Input(hint_text='Enter your name',k='in'),
        sk.B('Say hi!',size='x80'),
        size='y30'
    )],
    [sk.T(k='msg')]
]

def evman(app,ev):
    if ev=='Say hi!':
        app('msg',text=f"Hi {app['in'].text}!")

app=sk.MyApp(
    layout=lyt,
    event_manager=evman
    )
app.run()
Widget “Maths”
Note that in the above program, a BoxitH widget was used to put a text input and a button in an horizontal box widget, so that both of them get interpreted as a single entity in the layout (which has size (2 rows, 1 column)), with the label being put in the second row.
To simplify encapsulation of widgets, all SimpleKivy widgets support two arithmetical operators:
- multiplication (
*): Puts widgets next to each other horizontally, as if they were variables being multiplyed. - division (
/): Puts widgets below one another vertically, as if they were variables being divided.
In this context, the above layout can also be represented as $\frac{Input \cdot Button}{Label}$ in a (1 row, 1 column) layout:
1
2
3
4
5
6
lyt=[
    [
        ( sk.Input(hint_text='Enter your name',size='y30',k='in')*sk.B('Say hi!',size='x80') )/
        sk.T(k='msg')
    ],
]
You only need to keep in mind that the horizontal height and size_hint_y gets set by the first widget being multiplied, and the width and size_hint_x of the vertical box gets set by the first widget being divided.
sk.Input(hint_text='Enter your name',size='y30',k='in')*sk.B('Say hi!',size='x80'): Results in aBoxitHwidget withsize = "y30"(orheight=30, size_hint_y=None)- The abve
BoxitHis then divided bysk.T(k='msg'), resulting in aBoxitVwidget that doesn’t set thewidth, sosize_hint_x = 1is used by default.
The use of Widget Maths is optional. It is just a helpful feature to have for simple combination of widgets in boxes.
Widget Events
All widgets, which have events enabled during creation, will trigger a callback to the Event Manager (set by the event_manager argument in the MyApp class). This event manager can be:
- A single function
- … or multiple functions decorated by methods of an instance of
SimpleKivy.EventManager(see EventManager)
In any case, the function(s) must accept at least the two positional arguments app and ev, which are the current SimpleKivy.MyApp instance and the event (ID of the widget) that was triggered. See SimpleKivy.MyApp
Below is an example code for a program that captures all events and shows them in the screen in a Label widget with id "msg", alongside a count of all the events so far. 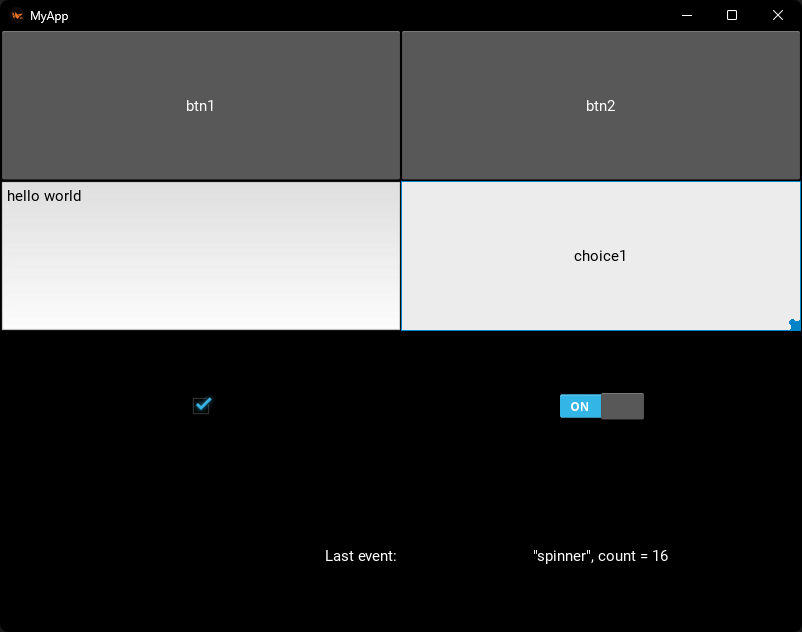
1
2
3
4
5
6
7
8
9
10
11
12
13
14
15
16
17
18
19
20
import SimpleKivy.SimpleKivy as sk

lyt=[
    [sk.B('btn1'),sk.B('btn2')],
    [sk.Input(hint_text="try typing",k='in', enable_events=True, on_event='text'), sk.Spinner2(enable_events=True,k='spinner')],
    [sk.CheckBox(active=True,k='cb', enable_events=True), sk.Switch(k='switch',enable_events=True)],
    [sk.T("Last event:", halign='right',padding=4),sk.T(k='msg')],
]

count=0
def evman(app,ev):
    global count
    app('msg', text=f'"{ev}", {count = }')
    count+=1

app=sk.MyApp(
    layout=lyt,
    event_manager=evman
    )
app.run()
Inside the event manager, you can perform actions based on the value of the ev argument. For that, you can create if or match-case structures.
1
2
3
4
5
6
7
8
9
10
11
12
13
14
# "if" structure
def evman(app, ev):
    if ev=="btn1":
        # do something
        pass
    elif ev=="btn2":
        # do something
        pass
    elif ev=="in":
        # do something
        pass
    elif ev in ("cb","switch"):
        # do something
        pass
1
2
3
4
5
6
7
8
9
10
11
12
# match-case structure
def evman(app, ev):
    match(ev):
        case 'btn1':
            # do something
            pass
        case 'btn2':
            # do something
            pass
        case 'in':
            # do something
            pass
Widget lookup.
When your app is already running, you can look up widgets by their ID, which is set by the k argument of SimpleKivy widgets.
For example, if you define a label widget with sk.Label("hello world", k="lbl"), you can get a reference to it by:
Through an instance of MyApp
app["lbl"]: The recomended method. Withappbeing an instance ofMyApp(the same as the first argument of theevent_manager).app.ids["lbl"]: Same as the above.app.ids.lbl: When the widget ID adheres to variable naming conventions, you can access the widget by theidsatribute of an instance ofMyAppusing dot notation.
Through sk.ids
sk.ids["lbl"]: Similar to the above, but you can access the widget by theidsatribute of theSimpleKivy.SimpleKivysubmodule. The difference is that when thekargument is not explicitly set, a reference is not kept in thesk.idsattribute.sk.ids.lbl: Similar to the above, but the widget ID must adhere to variable naming conventions to find it using dot notation.
Changing widget properties
When you already have a reference to a widget and you want to modify its properties, for example changing the text of a label or the source of an image, it can be done as easily as:
1
2
3
4
def evman(app,ev):
    ...
    app["lbl"].text = "New text"
    ...
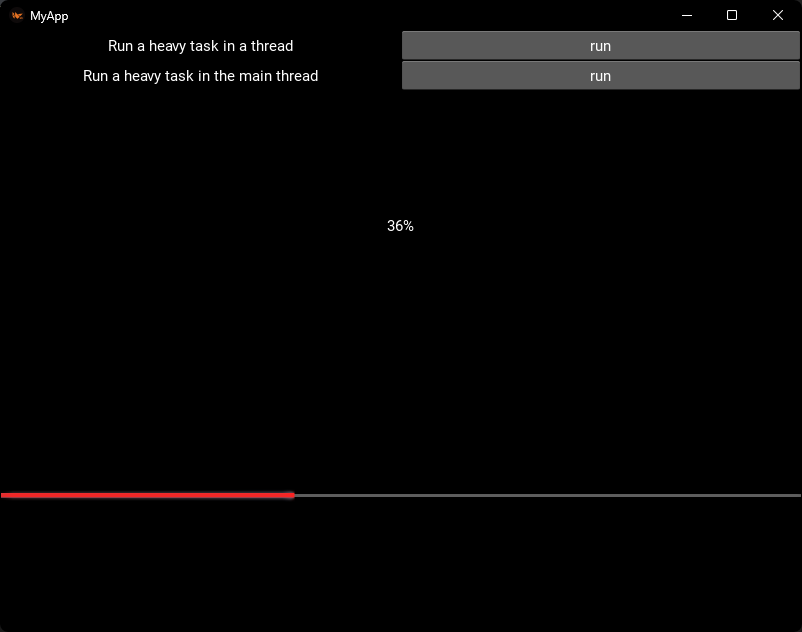
When your events trigger an intensive or lengthy task, the User Interface will freeze, so separating the heavy tasks from graphical related tasks is often the first challenge that noob UI developers face.
The solution is multithreading.
However, if you are managing multithreading tasks, you might get an error similar to "Cannot create graphics instruction outside the main Kivy thread" when modifying properties that change visual elements in your UI. To solve this, the recommended solution is to schedule your property changes with kivy.clock.Clock.
SimpleKivy offers an easier, intituive and foolproof way to make sure your widget property updates are always scheduled in the main kivy thread as soon as possible.
1
2
3
4
5
6
def evman(app,ev):
    ...
    app("lbl",text = "New text") # Foolproof property update
    # You can also schedule property updates for multiple properties
    # app("lbl", text = "New text", halign = "right", color = "red")
    ...
This method allows you to schedule property updates that won’t cause errors when updating your UI in the main thread or in other threads.
There are other ways to achieve this. For more information see the schedule_... methods in the class documentation of sk.MyApp.
ProgressBar Example
With the concepts mentioned above, we will make a simple program that runs a heavy task, and shows the progress in the UI.
1
2
3
4
5
6
7
8
9
10
11
12
13
14
15
16
17
18
19
20
21
22
23
24
25
26
27
28
29
30
import SimpleKivy.SimpleKivy as sk
import time

lyt=[
    [sk.T('Run a heavy task in a thread',size='y30')*sk.B('run',k='run-thread',size='y30')],
    [sk.T('Run a heavy task in the main thread',size='y30')*sk.B('run',k='run-main',size='y30')],
    [sk.T(k='msg')],
    [sk.ProgressBar(k='pb',max=30)]
]

def evman(app,ev):
    if ev=='run-main':
        app.call_event('heavy-task')
    elif ev=='run-thread':
        app.thread_event('heavy-task')

    elif ev=='heavy-task':
        app('msg',text='')
        for i in range(31):
            app('msg',text=f'{int(100*i/30)}%')
            app('pb',value=i)
            time.sleep(.1)
        app('msg',text='Finished!')

app=sk.MyApp(
    layout=lyt,
    event_manager=evman,
)

app.run()
When you run the heavy task in a thread, the UI behaves as expected. When you run it in the main thread, the UI freezes. Copy this code and try it yourself!